by Jobuza Team | Mar 12, 2026 | BLOG, IT/Tech Jobs, Latest Jobs, Railway Jobs
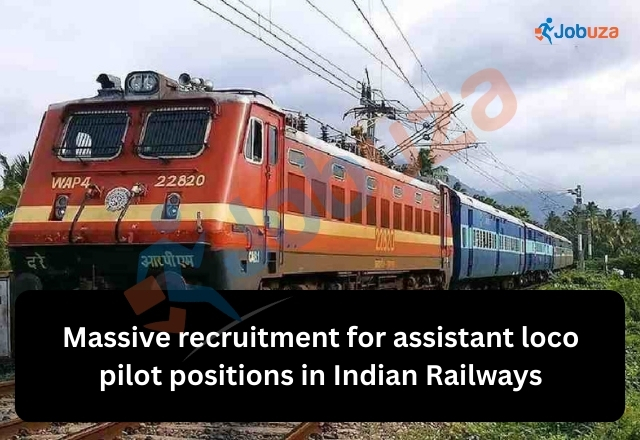
The Ministry of Railways has officially announced the RRB ALP Recruitment 2026, offering a total of 11,127 vacancies for the post of Assistant Loco Pilot (ALP) under Pay Level-2. This large-scale recruitment drive will be conducted through the Railway Recruitment Boards (RRBs) and aims to fill positions across 17 railway zones during the 2026–27 recruitment cycle.
For candidates seeking a stable and secure government job in the railway sector, this recruitment provides a major opportunity. Indian Railways is one of the largest employers in the country, and the Assistant Loco Pilot position plays an important role in railway operations.
Zone-Wise Distribution of RRB ALP Vacancies 2026
The announced vacancies are spread across multiple railway zones. Some zones have significantly higher openings, increasing opportunities for applicants in those regions.
| Railway Zone |
Vacancies |
| Central Railway |
1400 |
| East Central Railway |
700 |
| East Coast Railway |
1625 |
| Eastern Railway |
608 |
| North Central Railway |
457 |
| North Eastern Railway |
105 |
| Northeast Frontier Railway |
1276 |
| Northern Railway |
740 |
| North Western Railway |
600 |
| South Central Railway |
674 |
| South East Central Railway |
200 |
| South Eastern Railway |
1531 |
| Southern Railway |
250 |
| South Western Railway |
200 |
| West Central Railway |
541 |
| Western Railway |
214 |
| Chittaranjan Locomotive Works |
06 |
| Total |
11,127 |
Among all zones, East Coast Railway, South Eastern Railway, and Central Railway have the highest number of vacancies.
Eligibility Criteria for Indian Railways Assistant Loco Pilot Recruitment 2026
Candidates must meet specific educational requirements to apply for the Assistant Loco Pilot position.
Applicants should have completed Class 10 (Matriculation) or SSLC from a recognized board. In addition, they must possess an ITI certificate in a relevant trade from an institute recognized by NCVT or SCVT.
Commonly accepted ITI trades include:
Fitter
Electrician
Electronic Mechanic
Mechanic (Diesel)
Turner
Machinist
Refrigeration and Air Conditioning Mechanic
Other relevant technical trades
Candidates are advised to carefully review the official notification for the complete list of eligible trades.
Age Limit for RRB ALP 2026
To apply for the Assistant Loco Pilot post, candidates must fall within the prescribed age limit.
Minimum Age: 18 years
Maximum Age: 30 years
Age relaxation will be provided as per government rules for candidates belonging to SC, ST, OBC, and Persons with Disabilities (PwD) categories.
Selection Process for RRB ALP Recruitment
The selection process for the Assistant Loco Pilot post consists of several stages designed to evaluate the candidate’s technical knowledge and aptitude.
CBT 1 – Computer Based Test (Preliminary)
CBT 2 – Computer Based Test (Main Examination)
CBAT – Computer Based Aptitude Test
Document Verification
Medical Examination
Candidates must qualify in each stage to move forward in the recruitment process. Final selection will depend on performance in the exams and successful completion of the required medical standards.
How to Apply for RRB ALP Recruitment 2026
Candidates can submit their applications online through the official Railway Recruitment Board portal by following these steps.
First, visit the official application portal at rrbapply.gov.in.
Click on the Apply option and select the registration link to create a new account.
Enter basic details such as your name, mobile number, and email address to complete the registration process.
Log in using the registration number and password generated during registration.
Fill out the online application form carefully, including your educational qualifications and trade details.
Applicants will also need to upload scanned copies of the following documents:
Passport-size photograph
Signature
Category certificate for SC/ST candidates if applicable
After completing the form, pay the application fee using net banking, debit card, credit card, or UPI. Review all details carefully before submitting the form and download the confirmation page for future reference.
Why RRB ALP Recruitment 2026 Is Important
The RRB ALP Recruitment 2026 is one of the largest railway hiring drives of the year. With more than 11,000 vacancies available across multiple railway zones, the recruitment offers a strong opportunity for candidates with technical qualifications such as ITI.
Railway jobs remain highly popular because they provide long-term job security, competitive salaries, allowances, and opportunities for career growth. Candidates planning to apply should begin their exam preparation early and stay updated with official announcements related to exam schedules and admit cards.
For the latest updates and detailed information, applicants should regularly visit the official Railway Recruitment Board website.
by Jobuza Team | Mar 11, 2026 | BLOG, Trending News
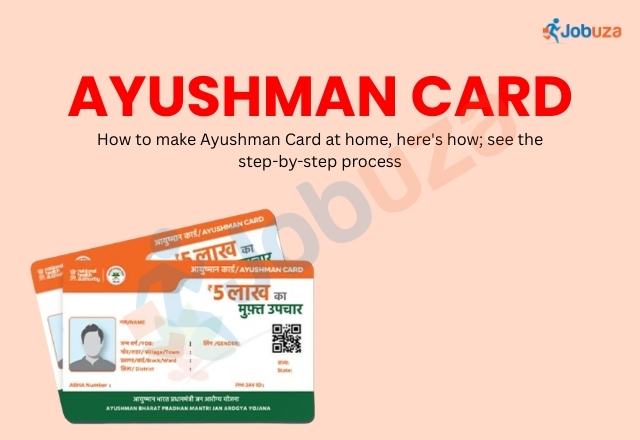
The Ayushman Bharat scheme provides financial support for medical treatment to economically weaker families across India. Under this scheme, eligible beneficiaries can receive free healthcare coverage of up to ₹5 lakh per year. The good news is that you no longer need to visit any government office to apply for the card. The Ayushman Card can now be created easily from home using your smartphone.
Before starting the application process, it is important to understand the documents required and the steps involved.
Documents Required for Ayushman Card
To apply for an Ayushman Card under the Ayushman Bharat Pradhan Mantri Jan Arogya Yojana, applicants must keep the following documents ready:
These documents help verify your identity and eligibility for the scheme.
How to Apply for Ayushman Card Using the Mobile App
The application process can be completed through the official Ayushman mobile application. Follow these steps to create your card from home.
First, download the Ayushman App on your smartphone and open it.
Next, select the option “Login as Beneficiary.” Enter your registered mobile number and complete the captcha verification. You will receive a one-time password on your mobile phone. Enter the OTP to log in to the application.
Once logged in, a form will appear on the screen. Under the scheme option, select PMJAY and then choose your state. In the search section, you can check eligibility by entering your Aadhaar number, family ID, or ration card number.
After entering the required details and captcha code, the system will verify whether you are eligible for the scheme. If your name appears in the beneficiary list, you can proceed with the e-KYC process.
After completing e-KYC verification, your Ayushman Card will be generated. You can then download the card in PDF format and keep a digital or printed copy for future use.
Key Benefits of the Ayushman Card
The Ayushman Bharat health scheme provides several important healthcare benefits to eligible families.
Under the scheme, beneficiaries receive free treatment coverage of up to ₹5 lakh per year at empanelled hospitals. The insurance also includes medical expenses during hospitalization.
In addition, the scheme covers three days of pre-hospitalization and fifteen days of post-hospitalization expenses. This means patients can receive support not only for the hospital stay but also for tests and follow-up treatment.
Diagnostic tests required during treatment are included in the coverage. Medicine expenses during hospitalization are also covered under the scheme.
Eligibility Conditions
Although the scheme provides extensive healthcare support, certain eligibility conditions apply. Only families listed in the official beneficiary database of the scheme can receive the benefits. Therefore, checking eligibility through the app or official portal is an important step before applying.
Conclusion
The Ayushman Bharat scheme has made healthcare more accessible for millions of families across the country. With the option to apply online, beneficiaries can now create their Ayushman Card from home without visiting government offices.
By keeping the required documents ready and following the simple steps in the mobile application, eligible individuals can quickly generate and download their card and start accessing healthcare benefits when needed.
Disclaimer: This content has been sourced and adapted from reports originally published by Dainik Jagran. The information has been edited for clarity and presentation purposes. The original content remains the property of its respective publishers.
Check More – Latest Government Job Updates
by Jobuza Team | Mar 11, 2026 | BLOG, Trending News
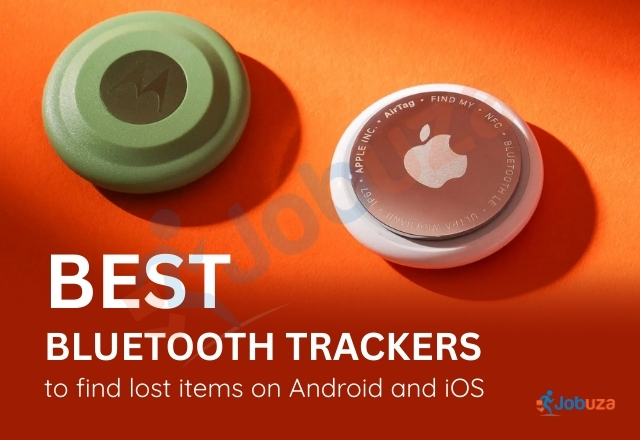
Bluetooth trackers are small, battery-powered gadgets designed to help you locate everyday items that are easy to misplace, such as keys, wallets, backpacks, or even passports. These compact devices connect to your smartphone and allow you to track belongings through a companion app.
If the item is nearby, you can open the app and trigger a loud alert sound from the tracker to locate it quickly. When the item is out of Bluetooth range, the tracker can rely on a larger crowdsourced network of smartphones to share its last known location.
While the Apple AirTag remains one of the most popular Bluetooth trackers available, there are now many alternatives that work with both Apple’s Find My network and Google’s Find My Device system. Your choice of tracker largely depends on the smartphone ecosystem you use. However, even if you own both Android and iPhone devices, or if your household uses multiple platforms, there are several trackers that can work well for you.
How to Choose the Right Bluetooth Tracker
Before buying a Bluetooth tracker, there are a few important factors to consider.
First, check the Bluetooth version. Newer Bluetooth Low Energy (BLE) standards provide better connectivity and improved power efficiency. In real-world usage, most trackers work within a range of about 10 to 30 metres indoors, while the range can extend further in open spaces.
Next, confirm which tracking network the device supports. Some trackers work with Apple’s Find My network, others support Google’s Find My Device system, and some operate independently through their own apps, such as the Life360 network used by Tile.
Battery type is another key factor. Most trackers use a replaceable CR2032 coin-cell battery, which typically lasts about a year. Some premium models feature rechargeable batteries instead.
You should also check the IP rating. Ratings such as IP67 or IP68 indicate resistance to dust and water, which is useful if you plan to attach the tracker to items that may be exposed to outdoor conditions.
Sound output matters as well. A louder alert makes it easier to locate items buried inside a bag or suitcase. Finally, review whether advanced features such as left-behind alerts or location history require a paid subscription.
All these factors together determine whether a tracker is simply a basic anti-loss device or a more advanced tool that integrates deeply with your digital ecosystem.
Cross-Platform Bluetooth Trackers
Some modern Bluetooth trackers can work with both Apple and Google networks. However, they typically cannot connect to both ecosystems at the same time.
During the setup process, you must choose which platform you want to use. If you decide to switch later, the device usually needs to be factory-reset and paired again. For users who may change smartphones in the future, this flexibility can extend the lifespan of the tracker.
Zebronics One Tag
Price: Rs 649 | Works with: iOS
The Zebronics One Tag is an affordable Bluetooth tracker designed specifically for Apple users. It supports the Apple Find My network and uses Bluetooth 5.3 to deliver stable connections while keeping power consumption low.
The tracker runs on a replaceable CR2032 battery that can last up to one year under normal usage. It produces an alert sound between 60 and 80 dB, which is sufficient for locating items indoors.
In terms of design, the device is compact and lightweight. It measures roughly 31 mm in diameter, is about 8 mm thick, and weighs approximately 6 grams. However, it does not carry a certified IP rating, so it should be kept away from water exposure.
Like other Find My certified products, anti-stalking protection is handled through Apple’s built-in tracking detection system. There are no subscription fees required for using the tracker.
Amazon Basics Aero Tag
Price: Rs 699 | Works with: iOS
The Amazon Basics Aero Tag is another budget-friendly Bluetooth tracker made for iPhone users. It supports Apple’s Find My network and operates using Bluetooth 5.3 for efficient connectivity.
The tracker uses a replaceable CR2032 coin-cell battery that can last around one year depending on usage. Its speaker produces an alert sound of approximately 80 dB, which is suitable for indoor environments but may struggle in very noisy surroundings.
The device weighs around 11 grams and has dimensions close to 37 x 37 x 8 mm. Similar to other entry-level trackers, it does not have an official IP rating.
Anti-stalking protection is handled through Apple’s unwanted tracking alerts built into iOS. Features such as Lost Mode and separation alerts are available through the Find My ecosystem without requiring any subscription.
JioTag Air
Price: Rs 749 | Works with: iOS
The JioTag Air from Reliance Jio offers more flexibility compared to many budget trackers. During setup, users can connect it either to Apple’s Find My network or to the JioThings app for Android devices.
However, it cannot operate on both systems at the same time. Switching ecosystems requires a factory reset.
The device uses Bluetooth 5.3 and provides a working range of around 15 metres on Android. For better performance, the company recommends using it with iOS devices.
A replaceable CR2032 battery powers the tracker for up to 12 months, and Jio includes an additional battery in the package. One of its standout features is the loud buzzer, which can reach between 90 and 120 dB, making it easier to locate inside bags or luggage.
The tracker weighs about 9 grams and measures approximately 38 x 38 x 7 mm. Although it is described as splash-resistant, it does not have a clearly defined IP rating. Anti-stalking alerts depend on the chosen network, either Apple’s detection system or notifications within the Jio app.
Noise Tag 1
Price: Rs 999 | Works with: iOS and Android
The Noise Tag 1 is primarily designed for Android users and supports the Google Find My Device network. It can also connect to iOS devices through its companion app, although its main advantage lies within the Android ecosystem.
The tracker uses Bluetooth 5.3 and offers a range of around 30 metres outdoors and roughly 10 metres indoors. It produces a 90 dB alert sound, which is loud enough for most home or office situations.
Power comes from a replaceable CR2032 battery that typically lasts about one year. The device carries an IPX4 rating, meaning it can handle light splashes but is not designed for full water exposure.
Anti-stalking protection is provided through Google’s unwanted tracker alert system built into Android. Basic tracking features are available without any mandatory subscription.
UGreen FineTrack Smart Finder
Price: Rs 1,697 | Works with: iOS
The UGreen FineTrack Smart Finder is another Bluetooth tracker certified for Apple’s Find My network. It relies on Bluetooth Low Energy technology and is designed exclusively for iPhone users.
One of its key advantages is battery life. The tracker uses a replaceable CR2032 battery that can last up to two years, which is longer than many budget models.
It produces an alert sound of around 80 dB and measures approximately 36 x 36 x 7 mm. Although the device is compact and lightweight, it does not feature a high-grade IP rating.
Anti-stalking protection is handled through Apple’s built-in safeguards, and there are no subscription fees for the tracking features.
Samsung Galaxy SmartTag 2
Price: Rs 2,799 | Works with: Samsung Galaxy smartphones
The Samsung Galaxy SmartTag 2 is designed specifically for Samsung Galaxy devices and works within the SmartThings Find ecosystem. It supports Bluetooth 5.3 and includes Ultra Wideband technology in compatible variants for precise directional tracking.
The device can reach a range of up to 120 metres in open environments. It runs on a replaceable CR2032 battery that can last around 500 days in standard mode and even longer when power-saving mode is enabled.
The SmartTag 2 has an IP67 rating, meaning it is resistant to dust and can survive immersion in up to one metre of water for 30 minutes.
It weighs 13.75 grams and measures about 28.8 x 52.44 x 8 mm. The tracker also includes a physical button that can trigger smart home routines through Samsung SmartThings. Anti-stalking protection is integrated within Samsung and Android systems, and no subscription is required.
Tile Pro by Life360
Price: Rs 3,299 | Works with: iOS and Android
The Tile Pro operates independently from Apple and Google tracking networks and instead connects through the Life360 platform. It works with both Android and iOS through the Tile mobile app.
One of its strongest features is range. Under ideal line-of-sight conditions, it can reach up to 105 metres. The device can also produce an alert sound of around 110 dB, making it one of the loudest trackers available.
The Tile Pro uses a replaceable CR2032 battery with an estimated lifespan of three years. It measures roughly 52 x 34 x 7.5 mm and weighs about 12 grams.
The tracker carries an IP68 rating, offering strong resistance to dust and water. Anti-stalking detection requires manual scans through the app, and the optional Anti-Theft Mode can suppress detection alerts. Tile Premium, a paid subscription, adds features such as Smart Alerts and extended location history.
Apple AirTag
Price: Rs 3,790 | Works with: iOS
The Apple AirTag remains one of the most reliable Bluetooth trackers for iPhone users. It works exclusively with Apple’s Find My network and uses Bluetooth along with Apple’s Ultra Wideband technology for precision finding on supported iPhones.
The tracker uses a replaceable CR2032 battery that typically lasts about one year. It weighs around 11 grams and has a diameter of 31.9 mm with a thickness of 8 mm.
The AirTag is rated IP67 for dust and water resistance. Apple also includes built-in anti-stalking features that automatically alert users if an unknown AirTag is moving with them. The tracker can also emit an audible sound if separated from its owner.
All tracking features are available without any subscription.
Pebblebee Clip 5 and Card 5
Clip 5 price: Rs 8,999 | Card 5 price: Rs 10,613 | Works with: iOS and Android
The Pebblebee Clip 5 and Card 5 represent the premium segment of Bluetooth trackers. They support both Apple’s Find My network and Google’s Find My Device system, although users must choose one ecosystem during setup.
Both trackers support Bluetooth Low Energy and offer a range of up to 150 metres in open environments.
Unlike most competitors, these devices use rechargeable lithium batteries. The Clip model charges via USB-C and can last up to 12 months on a single charge. The Card version supports Qi wireless charging and can last up to 18 months.
Both models feature IP66 ratings for dust and water resistance. The Clip also includes LED lights to help locate items visually in low-light conditions.
Anti-stalking protection aligns with the shared detection standards introduced by Apple and Google. Basic tracking features are free, although optional subscriptions provide additional features such as emergency sharing.
Final Thoughts
Bluetooth trackers have evolved significantly in recent years. Entry-level models provide simple item-finding capabilities, while more advanced trackers offer stronger build quality, longer battery life, louder alerts, and improved ecosystem integration.
Premium options may include Ultra Wideband technology for precision tracking, rechargeable batteries, or cross-platform compatibility.
Ultimately, the best Bluetooth tracker depends less on brand and more on the smartphone ecosystem you use and the features that matter most to you.
Click here for more – Trending News

by Jobuza Team | Mar 10, 2026 | BLOG, Trending News
Several important changes have come into effect from March 1, 2026, which may influence everyday expenses, travel plans, and digital payments. These updates cover multiple sectors including LPG prices, airline fuel costs, UPI payments, railway ticket booking systems, and SIM card security rules.
As the new month begins, these changes are expected to affect both household budgets and the way people access certain services. Here is a closer look at the key updates introduced this month.
1. LPG Cylinder Prices Reduced for Commercial Use
Oil marketing companies have announced a reduction in the prices of 19 kg commercial LPG cylinders for March 2026. The price cut ranges between ₹28 and ₹31 in major metro cities, providing relief to businesses such as restaurants and hotels.
However, the price of the 14.2 kg domestic LPG cylinder, which is commonly used in households, has remained unchanged.
2. Jet Fuel Prices Increased
At the same time, the cost of aviation fuel has increased. Indian Oil Corporation raised the price of Air Turbine Fuel (ATF) by around ₹4,977 to ₹5,498 per kilolitre across major metro cities.
ATF is one of the largest operational expenses for airlines. An increase in fuel costs often influences airline ticket prices, meaning airfares could become more expensive if the trend continues.
3. No Immediate Change in CNG, PNG, Petrol and Diesel
There have been no immediate changes in the prices of CNG, PNG, petrol, and diesel as the new month begins. However, fuel prices may still fluctuate depending on global crude oil prices.
In February, companies such as Adani Total Gas and Torrent Gas reduced the prices of CNG and PNG in several cities, offering temporary relief to consumers.
4. New Security Measures for UPI Payments
Digital payment systems are also expected to see changes. From March 2026, banks may introduce additional security requirements for higher value UPI transactions.
Instead of relying only on a UPI PIN, some banks could require multi-factor authentication or biometric verification for larger payments. These measures are intended to strengthen the security of digital transactions and reduce the risk of fraud.
5. Changes in Minimum Bank Balance Rules
Reports indicate that several public sector banks are reviewing their minimum balance policies for savings accounts.
Some banks have reportedly removed penalties for not maintaining the required minimum balance. However, private sector banks have not yet made similar changes, and customers should continue to check their bank’s latest policies to avoid charges.
6. New App for Train Ticket Booking
The Indian Railways has introduced a new application called RailOne, which will replace the older Unreserved Ticketing System (UTS) mobile app for booking general and platform tickets.
The RailOne app is designed to provide multiple services for passengers in one place, including:
-
Booking reserved and unreserved tickets
-
Buying platform tickets
-
Checking train schedules and PNR status
-
Planning journeys
-
Accessing Rail Madad services
-
Ordering food on trains
The new app aims to simplify the ticket booking process and improve the overall travel experience for railway passengers.
7. New SIM Binding Rules to Prevent Fraud
A new rule related to SIM card usage has also come into effect to strengthen digital security. The Department of Telecommunications has introduced a SIM binding requirement for app-based communication services.
Under this rule, apps that rely on mobile numbers for user identification must remain linked to the active SIM card installed in the device. This means users will not be able to operate these apps without the associated SIM.
In addition, web versions of such apps will automatically log out after a certain period, usually within six hours. Users will need to reconnect the device again using a verification process such as a QR code.
The new rule is expected to enhance security for communication platforms like WhatsApp, Telegram, Snapchat, ShareChat, and Signal.
What These Changes Mean for Consumers
The rule changes introduced in March 2026 affect several aspects of daily life, including fuel costs, digital payments, railway travel, and online communication security.
While some updates, such as reduced commercial LPG prices, may offer financial relief, others like increased aviation fuel costs could indirectly raise travel expenses. At the same time, stronger authentication rules and SIM binding requirements are aimed at improving security in digital services.
Click here for more – Trending News
by Jobuza Team | Mar 10, 2026 | BLOG, Trending News
Millions of salaried employees contributing to the Employees’ Provident Fund may soon receive good news. Early indications suggest that the government could consider increasing the provident fund interest rate for the financial year 2025–2026.
Reports indicate that the interest rate may be set at 8.50 percent, which would be 0.25 percent higher than last year’s rate. If this proposal is approved, EPF subscribers across the country could receive a higher annual interest amount credited to their accounts.
Although an official announcement has not yet been made, discussions around the possible increase are expected to take place soon.
Proposal for Higher PF Interest Rate Under Consideration
The proposed interest rate is expected to be discussed in a meeting of the Employees’ Provident Fund Organisation (EPFO) Central Board of Trustees.
If the board approves the proposal, the revised interest rate will apply to the current financial year and benefit millions of employees who contribute to the provident fund scheme every month.
Even a small increase in the interest rate can make a noticeable difference for long-term savings. A rise of 0.25 percent may appear modest, but it can add thousands of rupees in additional earnings when calculated on larger EPF balances.
In previous years, once the interest rate is approved, the amount is usually credited to subscribers’ accounts within a few months.
When Will the Interest Be Credited?
If the new interest rate is finalized in April, the credited interest is likely to appear in EPF accounts by June.
This timeline has generally been followed in past years after the government formally approves the rate recommended by the trustees.
Subscribers can check the credited interest and updated balance through the EPFO’s official online services.
How Much Interest Could Employees Receive?
The amount of interest an employee receives depends on the total balance available in the EPF account.
For example, if an employee has a provident fund balance of ₹5 lakh, an interest rate of 8.50 percent could result in approximately ₹42,500 being credited as annual interest.
Similarly, an account balance of ₹6 lakh could generate roughly ₹53,000 in interest for the year at the same rate.
These figures show how even a small increase in the interest rate can significantly improve retirement savings over time.
Financial Environment Behind the Possible Increase
The expected revision is being discussed at a time when the **Reserve Bank of India has recently made adjustments to certain key interest rates.
Despite these changes in the broader financial environment, small savings schemes have largely remained stable. A higher provident fund interest rate could therefore provide reassurance to salaried individuals who depend on EPF savings for long-term financial security.
Experts believe that improved fund performance and increasing participation in employment-linked schemes may have strengthened the financial position of EPFO, allowing the organisation to consider a slightly higher rate.
Government Announces Relief for Unclaimed EPF Accounts
In another important update, the government has also announced steps to return funds from inactive or unclaimed EPF accounts.
More than 3.1 million subscribers are expected to benefit from this initiative. In the first phase, around 700,000 account holders will be able to reclaim money from their inactive accounts by submitting a claim.
The move aims to ensure that employees can access their hard-earned savings instead of leaving funds unused in dormant accounts.
What Employees Should Do Now
While the possibility of a higher interest rate has created optimism among employees, the final decision will only be confirmed after official approval.
Subscribers are advised to wait for the government’s announcement before making any financial assumptions. Once approved, the revised rate will automatically increase the annual returns on EPF contributions.
For millions of workers, the provident fund continues to remain one of the most reliable long-term savings options. If the interest rate is raised to 8.50 percent, it could provide a welcome boost to retirement savings and strengthen confidence in the system.
Click here for more – Trending News
by Jobuza Team | Mar 10, 2026 | BLOG, Trending News
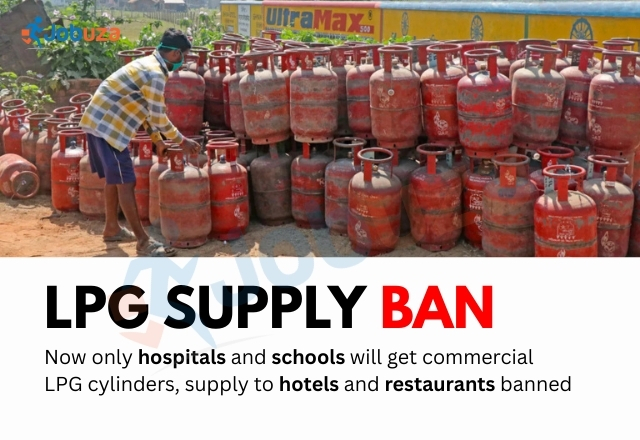
LPG Supply Ban: Oil marketing companies have reportedly instructed LPG distributors to supply commercial LPG cylinders only to hospitals and educational institutions for the time being. As a result, the supply of cylinders to hotels, restaurants, and other commercial establishments has been temporarily halted.
According to an internal communication reviewed by Moneycontrol, LPG distributors have been informed that under the latest directives from the Ministry of Petroleum and Natural Gas, non-domestic or commercial LPG cylinders should currently be supplied only to essential institutions such as hospitals and schools. Until further notice, hotels, restaurants, and other commercial businesses will not receive commercial LPG cylinder supplies.
Domestic LPG Booking Gap Increased
Along with the restrictions on commercial cylinders, there has also been a change in the booking rules for domestic LPG cylinders. Earlier, consumers could book the next cylinder within 21 days of the previous refill. The booking gap has now been extended to 25 days.
This change is expected to help authorities manage available LPG stock more efficiently during the current supply situation.
Supply of Commercial Cylinders Suspended
In another internal communication issued on March 8, oil marketing companies stated that the supply of non-domestic non-essential (NDNE) cylinders has been suspended until further notice.
The communication explained that the decision was taken due to disruptions in LPG imports and the worsening international situation affecting supply chains. Distributors have been instructed to inform all customers about the temporary suspension.
Officials have also asked divisional managers and sales teams to contact major customers directly and explain the situation. Distributors and business partners are expected to be updated regularly about product availability, and they will be notified once the supply situation improves.
Loading and Billing of Commercial Cylinders Stopped
An LPG distributor, speaking anonymously, said that both the loading and billing of commercial cylinders have been halted for now. According to the distributor, supplies will only resume after confirmation of a new LPG shipment.
Currently, the available LPG stock at bottling plants is being reserved mainly for domestic cylinders. Commercial cylinders are being supplied only in limited quantities for emergency services such as hospitals.
Supply Disruption Reported in Bengaluru
Distributors have also reported disruptions at the **Indian Oil Corporation Devanagothi terminal in Bengaluru. The shortage is reportedly linked to the delayed arrival of LPG shipments from Chennai and Mangaluru ports.
Due to the shortage of commercial LPG cylinders, the situation in Bengaluru has become increasingly difficult for businesses that depend on LPG for daily operations.
Hotels Warn of Possible Shutdown
The Bengaluru Hotels Association has warned that hotels may be forced to shut down if the supply of commercial LPG cylinders is not restored soon. According to the association, many restaurants and hotels rely entirely on LPG cylinders for cooking and daily operations.
Industry representatives have cautioned that prolonged disruptions could severely affect the hospitality sector.
Nationwide Supply Impact
LPG Supply Ban: Another LPG dealer stated that the bottling of commercial cylinders has been temporarily halted across the country. According to the dealer, commercial cylinder refilling stopped recently, and dispatches have been suspended nationwide.
The dealer added that the issue is not limited to Bengaluru and is affecting several regions across India. The government is expected to decide when commercial LPG supplies will resume once the availability of LPG improves and shipments arrive.
Click here for more – Trending News